Unit testing is the process carried over by the developers after completing their coding part in their development process. This involves testing either the components available in the project module or the tiny individual units of the module developed by the individual. In iOS, xcode lets the developer perform functional test which focuses on code functionalities, performance test on application run-time and UI Test on flow through the app UI.
Benefits of implementing Unit Testing
- Reduces the bugs on both existing and upcoming features.
- Tests are good documentation: A concise code example is better than a bunch of paragraphs on the documentation.
- Tests defend against the other programmers: We may be working on a product for a while and maybe switching to some other project. In such cases there might be a minor change requires and some other programmer might alter the code which should prevent the code from a new programmer. It reduces the biggest fear that programmer encounters ie., making the change to a piece of code and not knowing what’s going to break.
Implementation of Unit Testing on xcode :
Unit testing can be included in both existing projects and new projects. It is added as an additional target in our project.
- Adding Unit Testing and UI Testing to New Project:
-
-
- Open xcode and goto file → New → Project, to open the New Project window as shown below.
- Select Single View and click Next
- Fill the required fields as shown in the pop-up and make sure the checkboxes of Include Unit Testing & Include UI Testing are checked in-order to implement them on the project before the Next button has been clicked.
- Now Browse the desired location to save your code directory and Click on the Create button to create the project.
- Now you could able to see the project structure which has Unit Testing and UI Testing been implemented.
-
- Adding Unit Testing to Existing Project:
-
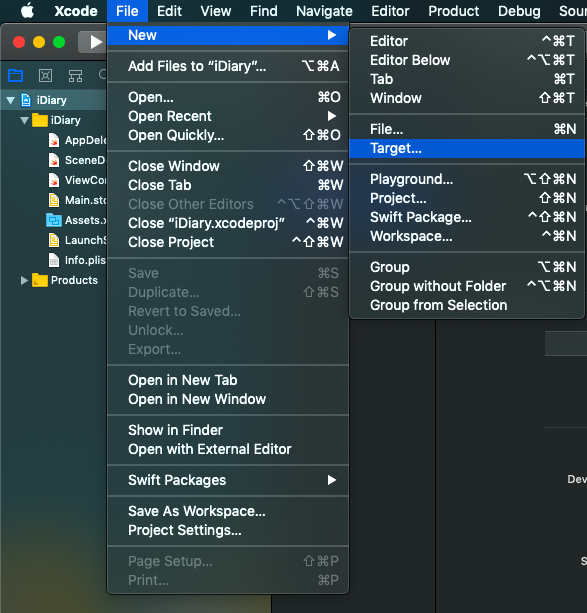
- Open the create Target popup from File → New → Target as shown below
- Now you could able to see the project structure which has the Unit Testing portion been implemented
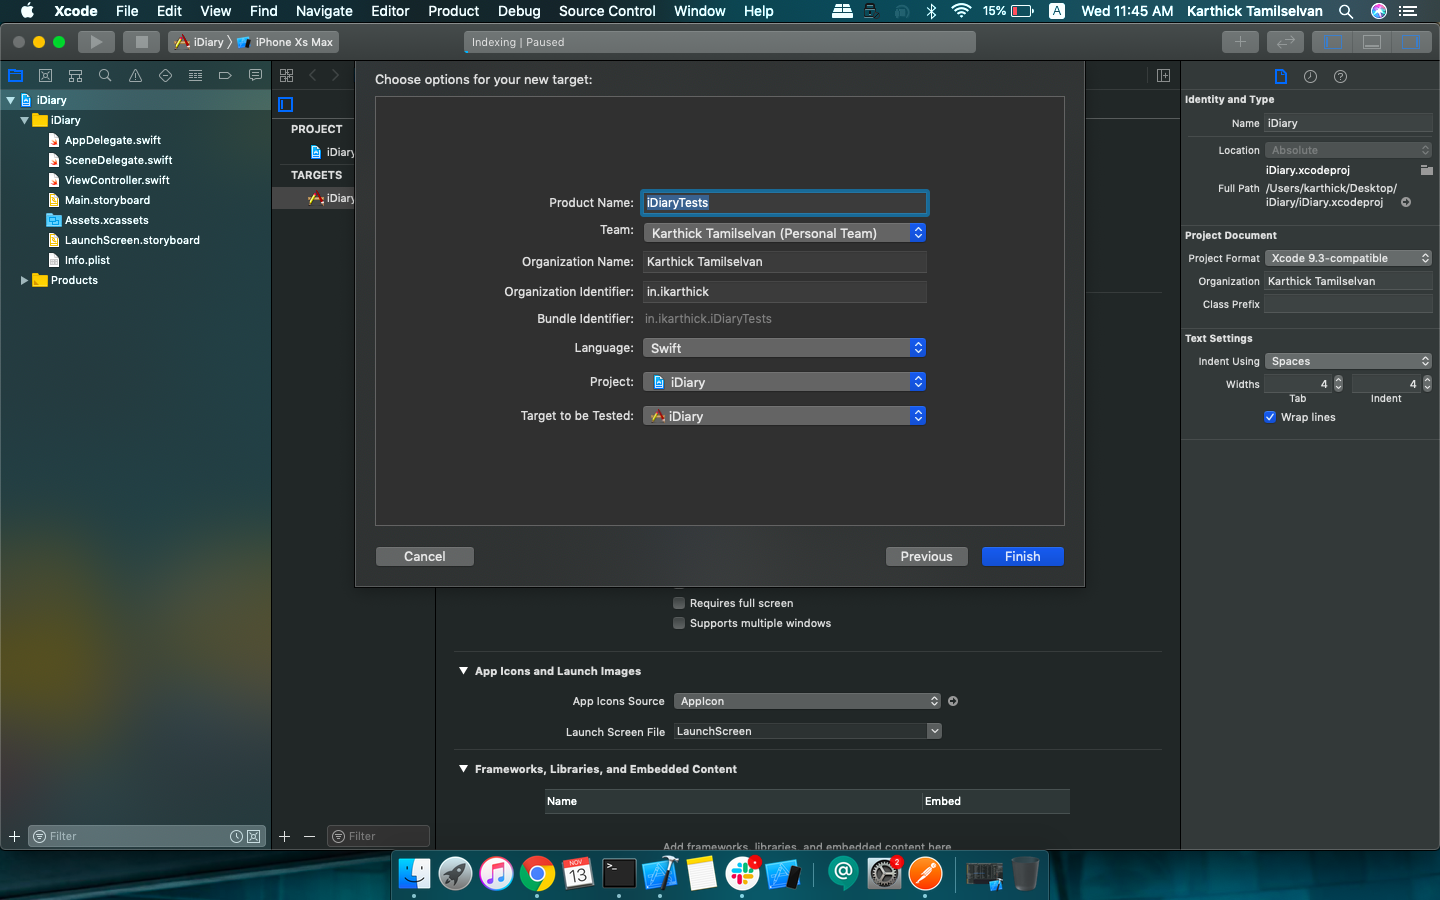
- Fill the required fields and make sure to select the valid Project & Target to be tested and click the Finish button.
-
Now you could able to see the project structure which has Unit Testing portion been implemented
c. Adding UI Testing to Existing Project:(similar to the above steps instead of selecting Unit Testing Bundle we’ll be selecting the User Interface bundle)
- Open the create Target popup from File → New → Target as shown below

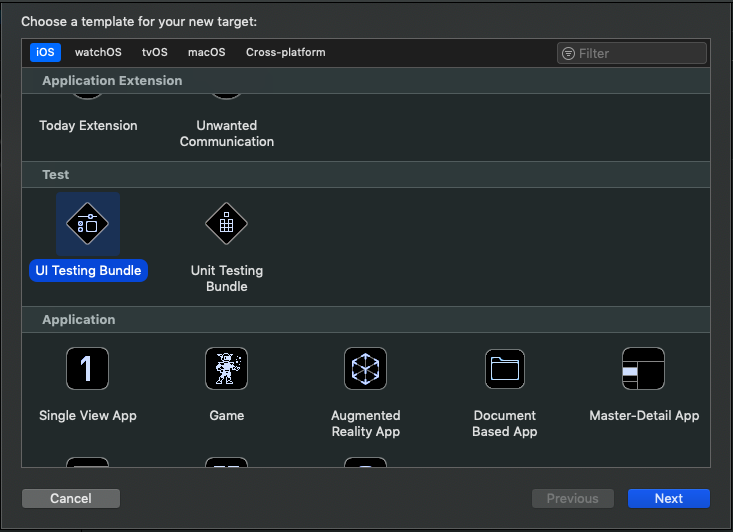
- Now scroll down to the Testing section and select the User Interface Testing Bundle and click the Next button
- Fill the required fields and make sure to select the valid Project & Target to be tested and click the Finish
- Now you could able to see the project structure which has UI Testing portion been implemented
Running the Test Cases:
Before running the test cases, we need to know controls in xCode that helps us to do unit testing,
From the image above we could able to see the highlighted controls Test Navigator Icon, List of Test-cases, Test Indicators & Test Indicators to run the Test-cases.
Let’s discuss about the highlighted items.
- Test Navigator Icon : This icon on the left navigator of xcode lets the developer to perform the test cases.
- List of Test-cases : This is nothing but the bunch cases written for testing a particular functionality.
- Test Indicators & Test Indicators to run the Test-cases : These indicators are used to run the test cases. Also it tells us the result after running the test case whether its successful or failed.
To run the test cases,
- Click on Test Navigator icon on the xcode’s left side navigator
- Now you’ll find the test cases under the Target created along with the Test Indicators. Tapping on the Test Indicator of the Target runs all the test cases written.
- We can also click the Test Indicator of particular test case to run it alone.
Hoping to see more on writing test cases, creation of test target’s and UI Testing on upcoming posts.