
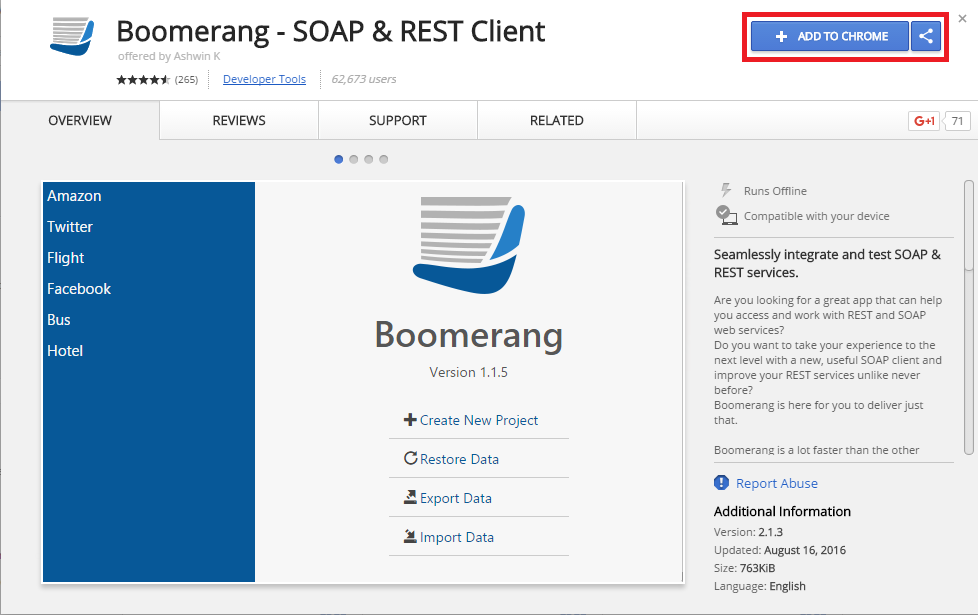
In this post I’ll discuss how to test your web service with “Google Chrome – Boomerang SOAP & REST Client” without having to write any additional code.
Getting “Google Chrome – Boomerang SOAP & REST Client”
To install Boomerang plugin:
- Use the following URL: https://chrome.google.com/webstore/detail/boomerang-soap-rest-clien/eipdnjedkpcnlmmdfdkgfpljanehloah/related(OR)
Click on the Customise button in Right-Top corner of the browser
![]()
Then Select “More Tools” “Extensions” extensions page will load.
Scroll down to the bottom of the page and select “Get more extensions”.
Chrome Web Store will open, In the left side of the browser you can find a search box. Enter “Boomerang – SOAP & REST Client” in the search box and press enter button to search.
In the listed apps, select the “Boomerang – SOAP & Rest Client” plugin

2. Below window will open, Select “Add to Chrome”
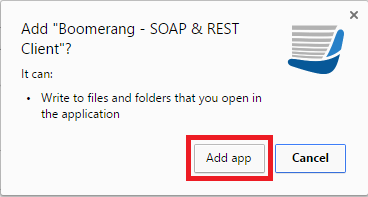
3. Once you selected, a small popup window will open, select “Add app”
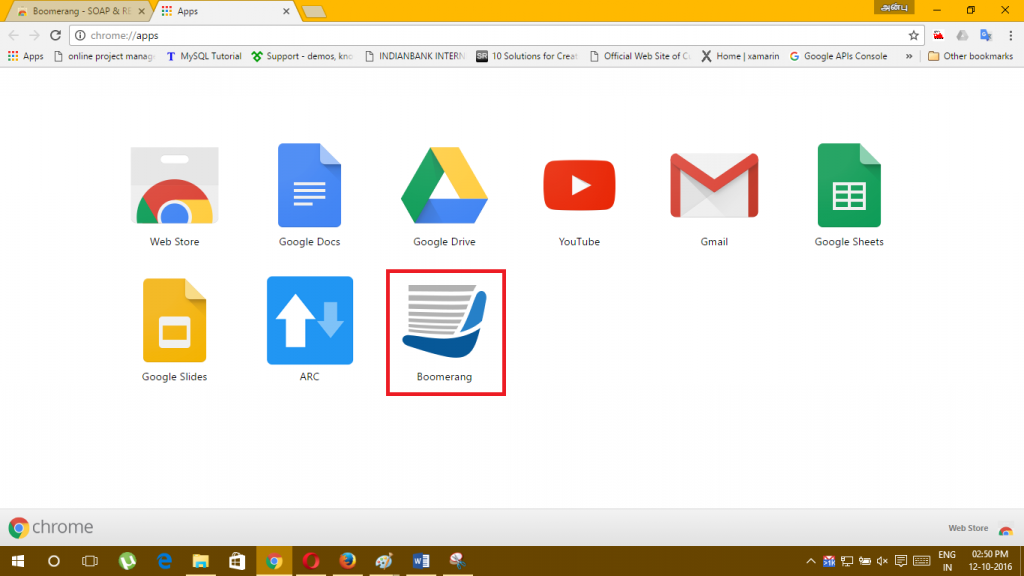
4. Now the plugin has been installed. You can find the app in Google Apps List.
Getting the WSDL from Salesforce
To download a WSDL document:
- From Setup, enter API in the Quick Find box, then select API.
- Download the appropriate WSDL:
-
- If you’re downloading an enterprise WSDL and you have managed packages installed in your org, click Generate Enterprise WSDL. Salesforce prompts you to select the version of each installed package to include in the generated WSDL.
- Otherwise, right-click the link for the appropriate WSDL document to save it to a local directory. In the menu, Internet Explorer users can choose Save Target As, while Mozilla Firefox users can choose Save Link As.
- On your computer, import the local copy of the WSDL document into your development environment.
Setting up “Google Chrome – Boomerang SOAP & REST Client”
Open the “Boomerang SOAP & REST Client” from the Google Application list.
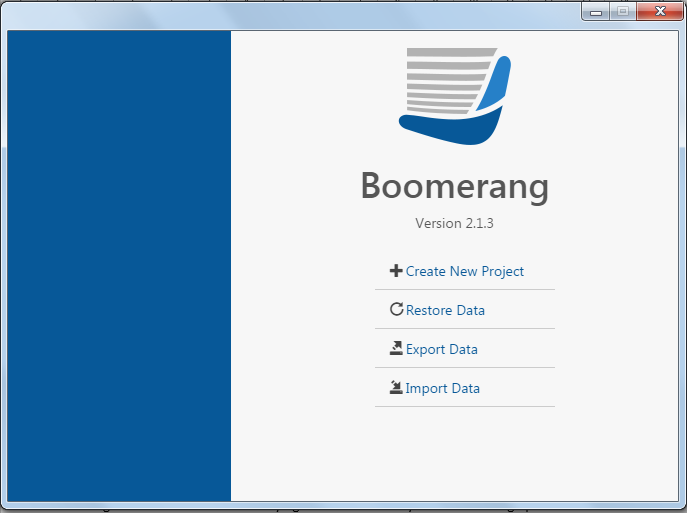
We need to create a new Boomerang project. Click the “Create New Project” link.
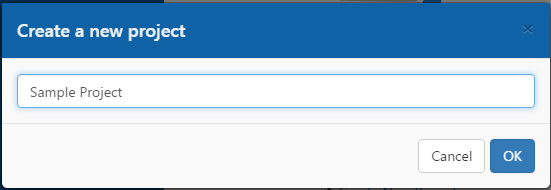
Enter the Project name “Sample Project” and Click “Ok” button.
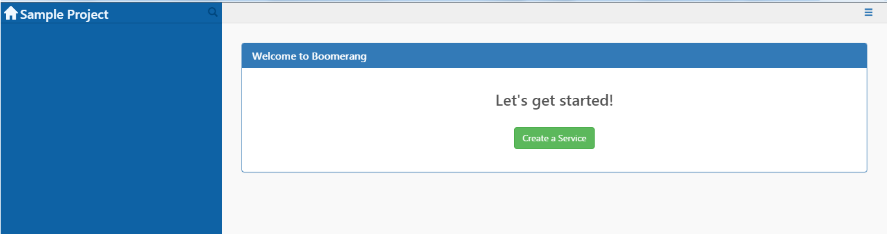
Click the “Create a Service” and enter the details like below.
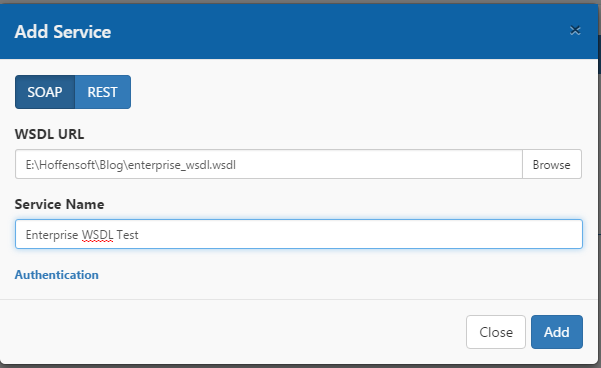
Click “Add” button.
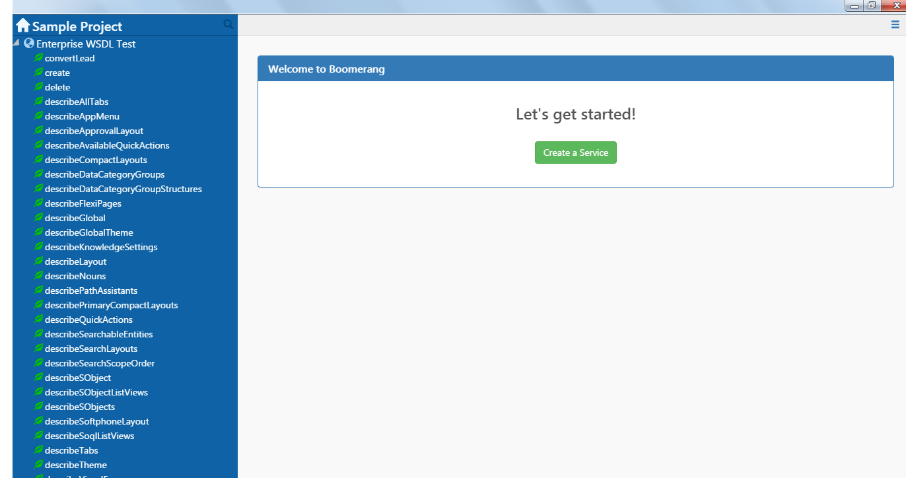
Using “Google Chrome – Boomerang SOAP & REST Client”
Getting Session ID
Now that we are all setup, let’s test our web service. First we need to login to Salesforce and get our session Id.
Go to the Login option and click the down arrow and get the menu like below:
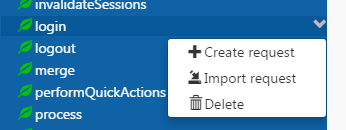
Select the “Create Request” option in the menu.

Change the XML like below:
Method: POST
URL: Need to provide the Salesforce URL with proper SOAP Version.
Need to provide the right Username, Password with Security Token without space.
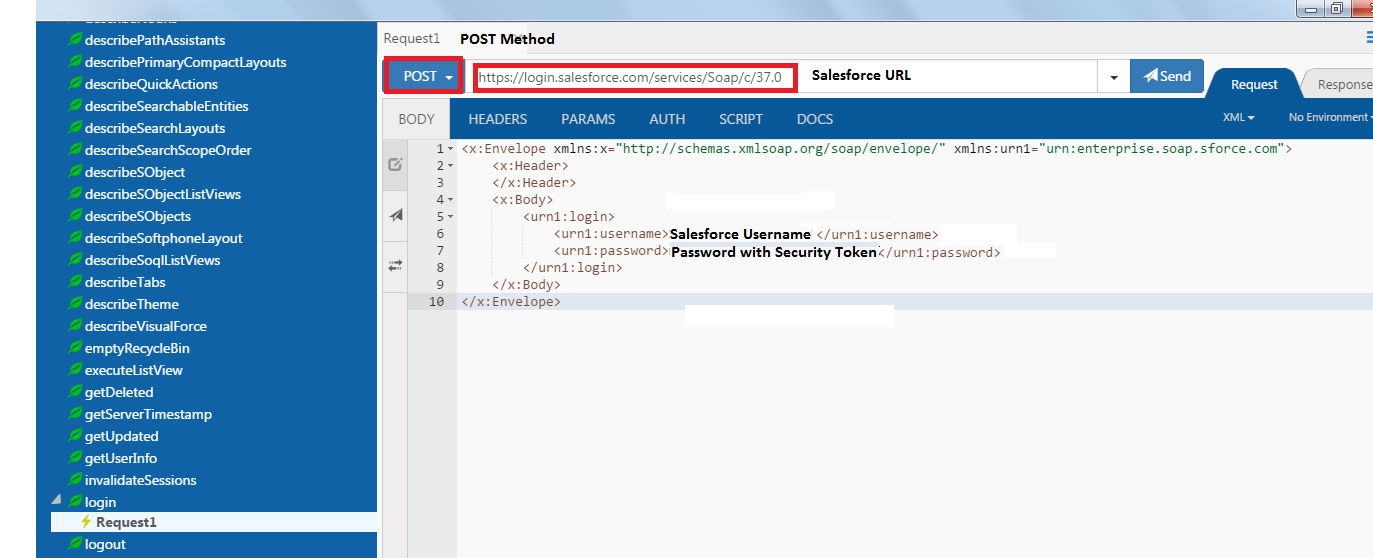
Click the “Send” Button and you will receive the Response like below:
Response in XML format with Response code 200.

Using Query Method:
Using this method we can retrieve the set of records based on the input query.
For this need to pass the Salesforce Session Id with the input XML.
In the Salesforce URL, need to replace the login with the domain name.
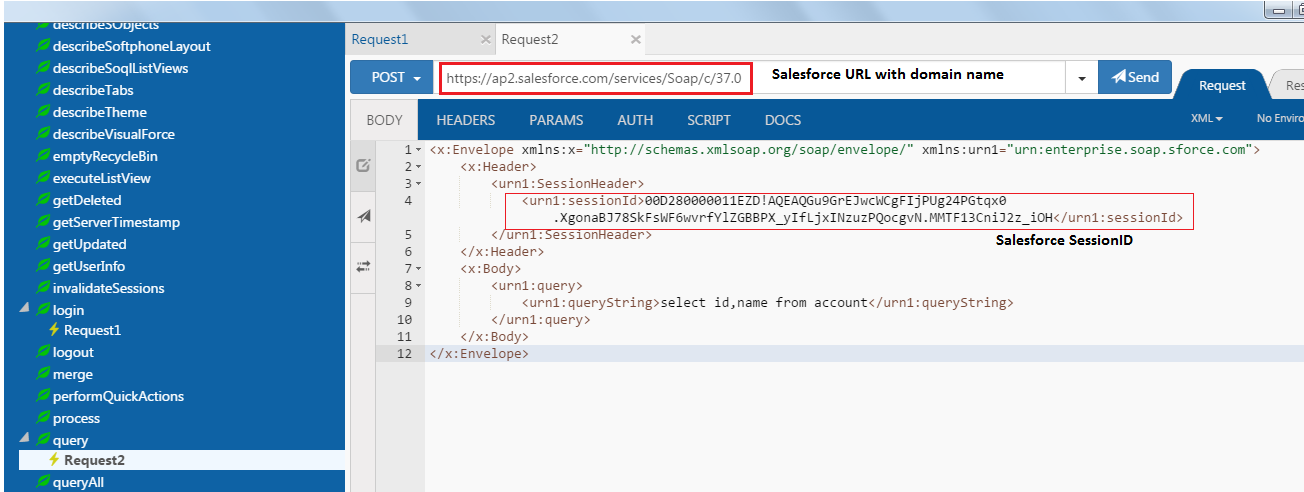
In this request we are trying to retrieve the all Account records Id with name.
Click the “Send” button and see the response like below:

In this response we are getting all Accounts details specified in the request.
We need to check the “QueryLocator” value. If its true mean, we got all the records from Salesforce Account. If it’s false mean, Need to use the “QueryMore” method to retrieve more records using QueryLocator Id. In our above example, QueryLocator flag is true. So no need to use the QueryMore method.
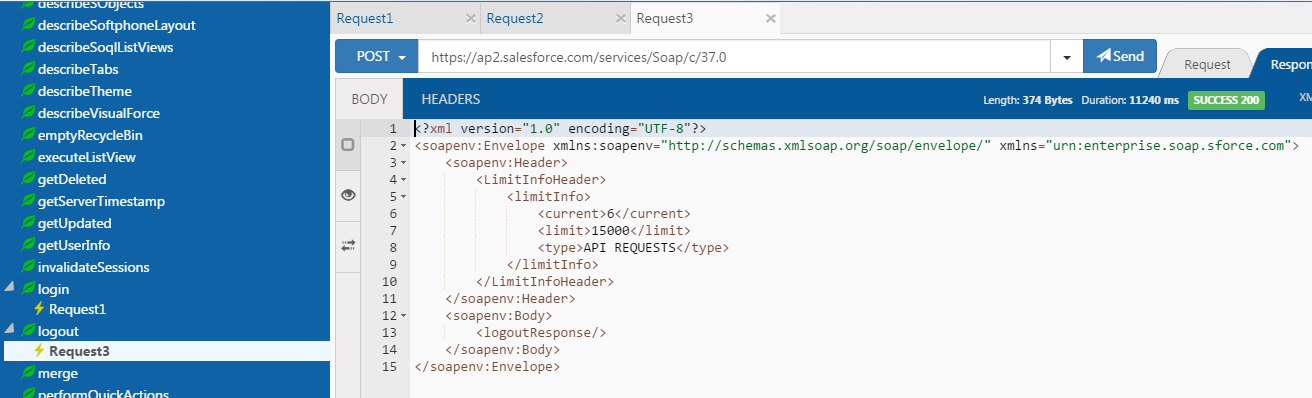
Using Logout:
This method is used to Ends the session of the logged-in user.For this need to pass the Salesforce Session Id with the input XML.
Need to pass the XML like below:
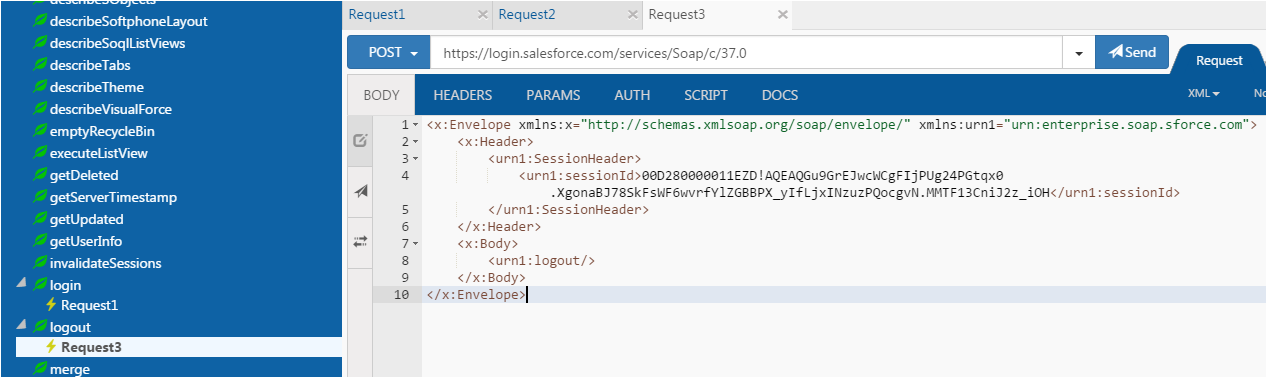
We will get the below response with response code 200:
Conclusion
“Google Chrome – Boomerang” is a great tool to help test web services out. I use it all of the time to verify that Salesforce is returning the correct data from my web service instead of trying to write against the web service and trying to determine if my client is messing up.